Photo Guide · Step-by-step
How to Colorize Black and White Photos (Step by Step)
To colorize a black and white photo, scan it at 600 dpi, run it through an AI colorizer with an instruction that protects faces and composition, then check the colors you can verify, such as uniforms, signs and remembered clothing. AI gets skies and foliage right most of the time. Clothing and painted objects are educated guesses.
By Froging AI Editorial Team · · 8 min read
Step 1: Get a clean scan of the photo
The colorizer can only work with what the scan captured. A blurry phone shot with glare produces blurry, blotchy color. Clean the print with a soft brush, take it out of any frame or plastic sleeve, and scan it flat.
| Source | Scan at | Why |
|---|---|---|
| Wallet or 4×6 in print | 600 dpi | Enough detail for faces in group photos |
| 5×7 or 8×10 in print | 300–400 dpi | Larger prints already hold the detail |
| 35mm negative or slide | 2400–3200 dpi | Needs a film scanner or a scanner with a film holder |
| Phone photo of a print | Highest camera resolution | Shoot straight on, in open shade, without flash |
Scan in color mode even for a black-and-white print. It keeps the sepia or yellow cast as information instead of flattening it, and the restoration step can remove it later. Save a copy of the untouched scan before you change anything.
Step 2: Decide whether to restore before colorizing
Yellowing, stains and faded contrast shift the greys the colorizer reads. A yellowed face often turns orange; a faded suit turns muddy brown. If the print is damaged, remove the damage first, or use a tool that restores and colorizes in one pass.
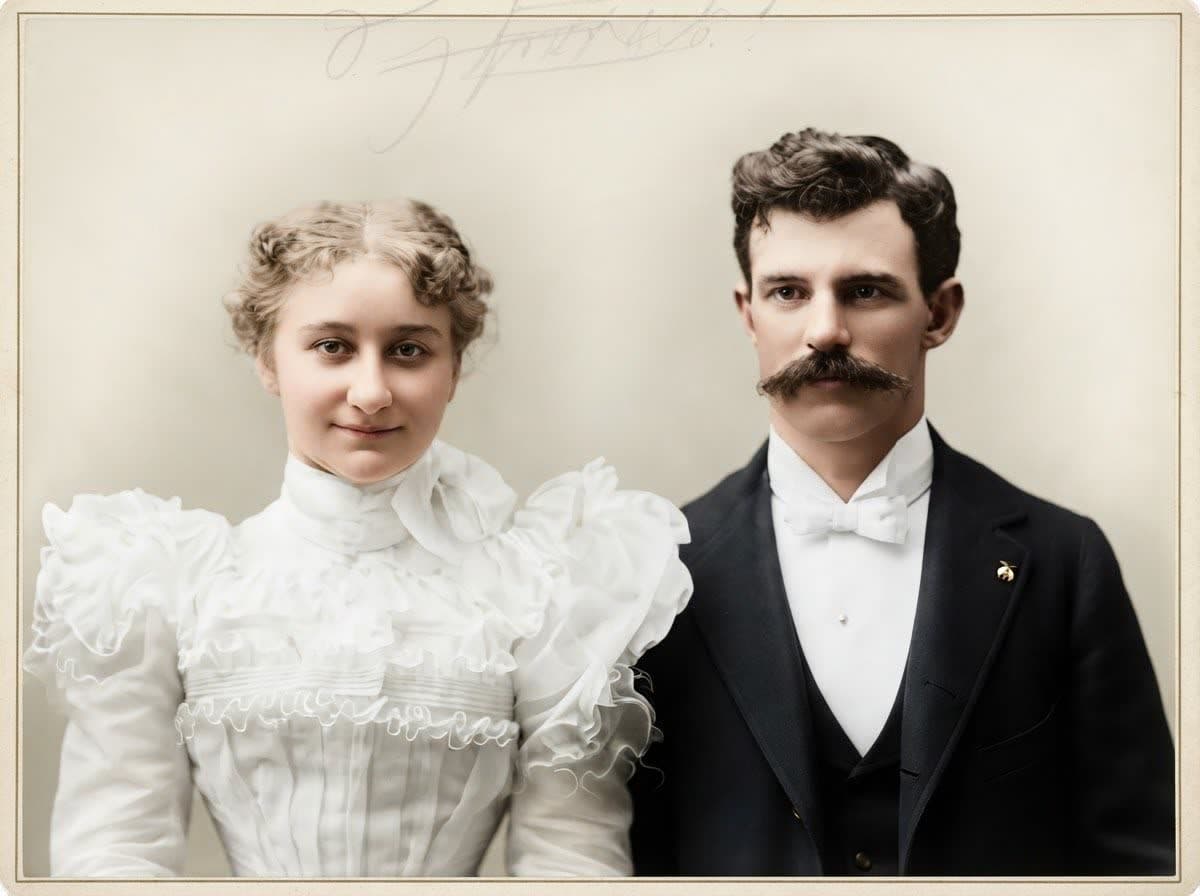
Here is the same portrait both ways. The color-only version keeps the stains and the paper texture; the restored version removes them before adding color.
 Original
 Natural colorOriginalRestore + colorize
Original: Unknown photographer, “Mr. and Mrs. Ova Mead, wedding portrait”, public domain via Wikimedia Commons. Both results are single, unedited runs.
Step 3: Colorize it with AI
You have two options. A dedicated colorizer has the instruction built in: on our photo colorizer you upload the scan, choose Natural color, Restore + colorize or Vintage film color, and download the result about a minute later.
A general AI image editor, including the ones in chat assistants, can also colorize, but a short request such as “add color” sometimes redraws faces or crops the frame. Spell out what must stay the same. This is the instruction our Natural color preset uses; it works as a starting point in most image editors:
Colorize this black-and-white photo with natural, realistic colors. Keep every face, expression, pose, hairstyle, clothing detail, background and the full composition exactly the same. Use believable skin tones and period-appropriate colors for clothing, hair and objects. Do not add, remove, crop or restyle anything.
Step 4: Check the colors you can verify
A black-and-white photo stores brightness only. A red dress and a green dress of the same darkness print as the same grey, so the colorizer has to pick one. Sort what you see into three groups:
- Usually right
- Skin in good light, sky, grass, trees, water, wood, brick
- Often guessed
- Dresses, shirts, ties, hats, cars, painted doors and walls, flowers
- Needs research
- Military uniforms and insignia, school or team colors, flags, shop signs, vehicles with known liveries
For family photos, the best source is usually a relative who remembers the house, the car or a favourite coat. For uniforms and insignia, look up the unit and year. For an old street, period postcards, hand-tinted prints and paint catalogues show which colors were common.
Then compare each face with the original at full size. Generative models can smooth wrinkles, change eye shape slightly or tidy a hairline, especially when a face is small. If a face no longer looks like the person, run it again.
Step 5: Fix wrong colors
The fastest fix is to rerun the colorizer with the real colors written into the instruction. Add a sentence to the end, for example: “The woman’s dress is dark green wool. The car is black. Keep everything else the same.” Name only what you know; every extra detail is one more thing the model might change.
For a single small area, an editor is quicker. In Photoshop or GIMP, add a new layer, set its blend mode to Color, paint over the area with the correct color and lower the layer opacity until the texture shows through. The Color blend mode keeps the brightness of the original and changes only the hue and saturation.
Step 6: Save, label and share
Keep the original scan and the colorized copy as separate files, and add “colorized” to the file name. When you share it, say that it is colorized and, if you can, show the original next to it. People reading family history or local history later should be able to tell what was recorded and what was added.
AI colorizer, Photoshop or by hand: which method to use
| Method | Time per photo | Skill needed | Use it when |
|---|---|---|---|
| Online AI colorizer | About a minute | None | You have many family photos, or want a first pass |
| Photoshop Colorize neural filter | A few minutes plus touch-ups | Basic Photoshop | You already pay for Photoshop and want layer control |
| Manual layers (Photoshop, GIMP) | 30 minutes to several hours | Intermediate | One important photo where every color is researched |
A practical mix for an important photo: colorize it with AI, then correct the two or three colors you know are wrong with a Color layer. You get most of the work done in a minute and spend your time only on what matters.
How AI photo colorization works
Colorization models are trained on millions of color photos that have been converted to greyscale. The model learns which colors usually go with which shapes, textures and brightness levels, then applies that to your photo. That is why a sky comes out blue and grass green: those pairings are consistent in the training data. A coat or a car has no consistent color, so the model picks a common one.
Open-source projects such as DeOldify made automatic colorization widely available around 2018, and Adobe added a Colorize filter to Photoshop in 2020. Current image-editing models go further: they can follow a written instruction, so you can tell them to remove stains, keep a face unchanged or make a dress a specific color.
Colorizing photos: FAQ
Free options, accuracy, scan settings and AI assistants.
What is the easiest way to colorize a black and white photo?
Upload it to an online AI photo colorizer. On Froging AI’s photo colorizer you pick a preset and get a result in about a minute; new accounts colorize the first photo free, then each photo uses 4 credits.
Can I colorize a photo for free?
Yes, with limits. Froging AI gives new accounts one free image, and Photoshop’s Colorize neural filter is included with a Photoshop subscription. Manual colorizing in a free editor such as GIMP costs nothing but takes much longer.
Can ChatGPT or Gemini colorize photos?
General AI image editors can colorize when you upload a photo and ask for it. Use an instruction that says to keep faces, poses and composition unchanged, like the one in this guide, because a short request such as “add color” can lead to a redrawn photo.
Are AI colorized photos historically accurate?
No. A black-and-white photo stores brightness only, so the model predicts likely colors. Skies and foliage are usually close; clothing, cars and painted surfaces are guesses. Treat the result as an interpretation and label it as colorized.
What resolution should I scan old photos at?
Scan small prints such as 4×6 at 600 dpi and larger prints at 300–400 dpi. Negatives and slides need 2400 dpi or more. Higher resolution matters most for group photos with small faces.
Should I restore or colorize first?
Restore first, or use a tool that does both in one pass. Yellowing, stains and low contrast change the greys the colorizer reads, which leads to orange skin and muddy colors.